


If you want a repeatable way to generate contracts from structured data and collect signatures fast, you can automate document signing by using Airtable as the system of record, Google Slides as the templated document builder, Google Drive as the controlled storage layer, and DocuSign as the signing and audit layer.
To make this work end-to-end, you’ll define a clean Airtable schema, build a Slide template that behaves like a document, generate a PDF to Drive with consistent naming and permissions, then send a DocuSign envelope and write the signing status back to Airtable so your team always knows what’s pending, signed, or failed.
You’ll also need to decide whether this workflow is right for your operations team based on volume, compliance needs, and how standardized your agreements are, because automation only pays off when your inputs are stable and your exceptions are predictable.
Introduce a new idea: once you understand the core workflow, you can choose between manual, automated, or hybrid approaches and then harden the system with security, monitoring, and template versioning so it scales without breaking.
What is an Airtable → Google Slides → Google Drive → DocuSign document signing workflow?
An Airtable → Google Slides → Google Drive → DocuSign document signing workflow is a template-driven document automation system that turns Airtable records into a generated file (via Google Slides), stores a final PDF in Drive, and routes it through DocuSign for legally recognized e-signatures with tracking and audit history.
To better understand how it works, start by seeing each tool as a specialized “stage” in one pipeline rather than four separate apps.
What roles do Airtable, Google Slides, Google Drive, and DocuSign each play?
Airtable holds the authoritative fields (customer name, pricing, dates, signer email, approver, document type), Google Slides converts those fields into a formatted document using a template, Google Drive stores the generated PDF with the right sharing settings, and DocuSign manages signature routing, reminders, identity controls, and final completion artifacts.
More specifically, this role separation is what makes the workflow reliable: each platform does the job it is strongest at.
- Airtable = truth + triggers
You treat each record as a “document request.” When the record reaches a status like Ready to Send, it triggers the generation and signing flow. - Google Slides = layout engine
Slides becomes your “document designer” where you control typography, spacing, tables, and branded visuals—then export to PDF consistently. - Google Drive = storage + governance
Drive is where you enforce permissions, naming conventions, folder structure, and retention. It’s also the stable link you reference from Airtable. - DocuSign = signing + audit
DocuSign is the execution layer: it sends envelopes, collects signatures, timestamps events, and produces completion certificates. DocuSign also explains that e-signatures are legally valid in all U.S. states under applicable laws. (docusign.com)
What does the end-to-end data flow look like in practice?
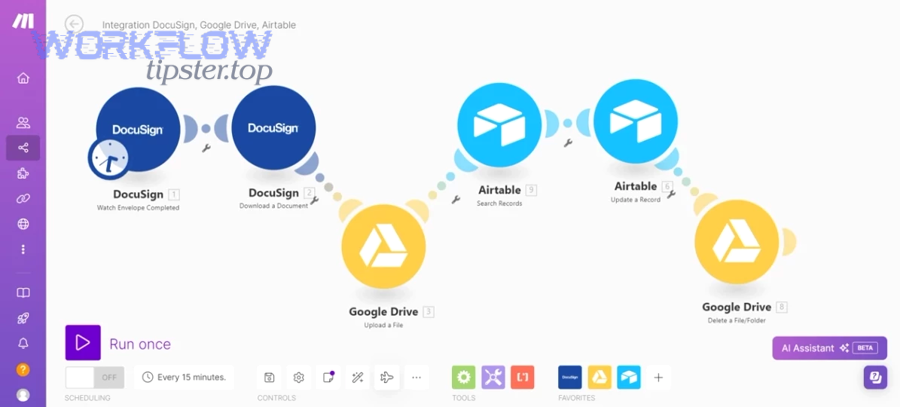
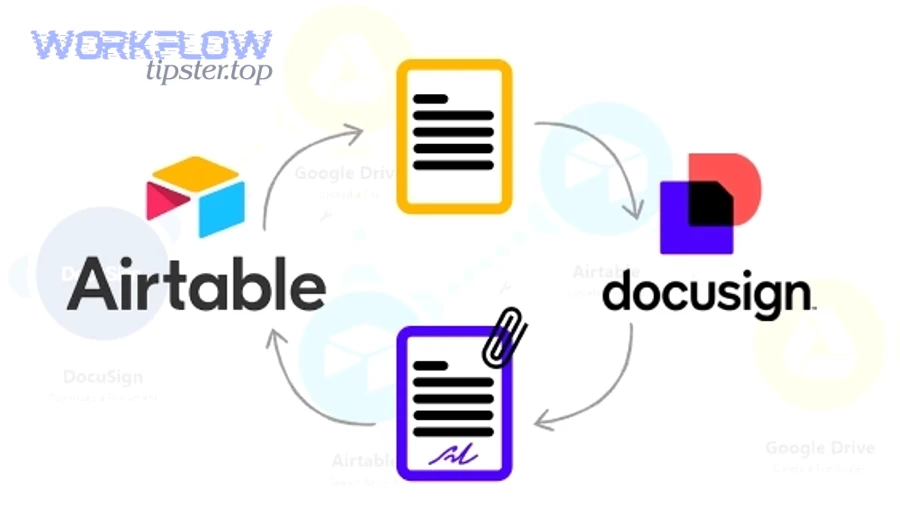
In practice, the data flow is: Airtable record → template selection → document generation → PDF stored in Drive → DocuSign envelope sent → status updates back to Airtable.
Next, focus on the “loop-back” step—writing status back to Airtable—because it turns a one-time send into a trackable operations system.
- Record created/updated in Airtable (e.g., Deal Approved = Yes, Signer Email present).
- Template chosen (e.g., “NDA v3,” “Sales Order v2,” “HR Offer v4”).
- Slides template duplicated and placeholders replaced with Airtable fields (e.g., {{CompanyName}}, {{Price}}, {{StartDate}}).
- Slides exported to PDF and saved into a controlled Drive folder.
- Drive file link written back to the Airtable record (so humans can verify the PDF).
- DocuSign envelope created and sent using the PDF from Drive.
- Envelope status tracked (Sent → Delivered → Completed/Declined/Void/Expired), and updates flow back to Airtable for reporting and follow-ups.
What files and fields should you standardize before automation?
Before you automate, standardize the minimum set of fields, files, and rules that let the workflow behave predictably.
Then, lock down the “inputs” so the automation doesn’t generate bad agreements faster than a human could.
- Airtable fields (data contract)
- Document Type (single select)
- Template Version (single select)
- Signer Name, Signer Email (text/email)
- Internal Owner (collaborator)
- Status (single select: Draft → Ready → Sent → Completed → Exception)
- Document ID (formula/auto-number)
- PDF Drive URL (url)
- DocuSign Envelope ID (text)
- Drive folder structure
- /Agreements/{Year}/{Document Type}/
- Separate folders for Draft PDFs vs Completed PDFs if you have retention needs
- Naming convention
- {DocumentType}_{CompanyName}_{DocumentID}_{YYYY-MM-DD}.pdf
- Template rules
- One source of truth per clause set (avoid multiple unofficial copies)
- Placeholders must be consistent and uniquely identifiable
- Exception policy
- What happens if signer email is missing?
- Who gets notified if PDF generation fails?
- When do you stop retries and flag a record?
Do you need this workflow for your document signing process?
Yes, you likely need an Airtable → Google Slides → Google Drive → DocuSign document signing workflow if you send repeatable agreements at scale, because it reduces manual document prep, improves tracking, and creates a consistent audit trail—while still letting operations keep control over templates and approvals.
However, the real decision becomes clear when you compare your document volume and variability against the cost of building and maintaining automation.
Yes/no decision: what are the best use cases and non-use cases?
Best use cases are standardized, high-frequency documents where the structure stays stable and only the fields change. Non-use cases are highly negotiated agreements where each document is a one-off.
Specifically, this workflow wins when you can treat documents like “products” with versions and rules.
Great fit
- NDAs, MSAs with fixed clauses, standard SOWs
- HR offer letters with structured compensation fields
- Vendor onboarding forms and recurring approvals
- Customer renewal paperwork with predictable pricing fields
Not a great fit
- Complex legal redlines where humans constantly change clauses
- Very low volume (e.g., 1–2 documents per month)
- Situations where signatures must happen inside another system with strict controls
- Documents requiring specialized digital certificate signatures in specific jurisdictions (beyond typical eSignature needs)
What are the biggest benefits and risks (compliance, errors, access)?
The biggest benefits are speed, consistency, and visibility; the biggest risks are incorrect data mapping, permission mistakes, and weak exception handling.
More importantly, you can reduce those risks by designing the workflow as “guarded automation” with validation gates.
Benefits
- Faster turnaround: generate and send in minutes instead of hours
- Consistency: one template source reduces format drift
- Operational visibility: Airtable dashboards show bottlenecks
- Audit readiness: DocuSign event history supports accountability
- Less rework: fewer copy/paste mistakes across fields
Risks
- Wrong fields inserted → add a “Preview PDF” step before sending
- Incorrect signer routing → validate signer emails and roles before envelope creation
- Drive oversharing → use restricted folders and service accounts
- Template drift → enforce version fields and deprecate old templates
- Automation failure loops → implement retries with backoff and a dead-letter queue
From a legal enforceability perspective, electronic signatures are broadly recognized in the U.S. under ESIGN and UETA frameworks, which is why eSignature platforms emphasize intent, consent, and record retention as core requirements. (juro.com)
How much time and cost can you realistically save?
You can realistically save time when you eliminate repetitive document prep, reduce follow-ups, and shorten cycle time—especially when the workflow includes automated reminders and centralized tracking.
Next, anchor your expectations in observed benchmarks rather than assumptions.
According to a case study involving the University of Virginia, through Internet2 NET+, implementing DocuSign resulted in thousands of hours in time savings annually. (internet2.edu)
And in a higher education operations example summarized by EDUCAUSE Review (sponsored content), institutions reported measurable reductions in processing time when using e-signatures, including figures such as a 41% reduction in student enrollment processing time in some contexts. (er.educause.edu)
For an operations team, the most practical way to estimate savings is to track:
- Minutes spent per document today (prep + QA + sending + reminders)
- Monthly document volume
- Rework rate
- Average time-to-sign (cycle time)
Even a conservative reduction of 10–20 minutes per document becomes substantial once you hit 100+ documents per month.
How do you set up Airtable → Google Slides → Google Drive → DocuSign document signing step by step?
Set up Airtable → Google Slides → Google Drive → DocuSign document signing by using a template-first method in five steps—design your Airtable base, generate a Slides-based document from placeholders, export a PDF to Drive with controlled permissions, send it via DocuSign, and sync envelope status back into Airtable for tracking and follow-up.
Below, the key is to treat the workflow as two connected systems: document generation (Airtable + Slides + Drive) and signature execution (DocuSign + Airtable updates).
Step 1: Design the Airtable base and triggering rules
Design the Airtable base by separating “document requests” from “templates” and “signing events,” then trigger automation only when the record passes validation (all required fields present).
To begin, define your base structure so it can support reporting, retries, and audits.
Recommended tables
- Requests (one row per agreement to generate and sign)
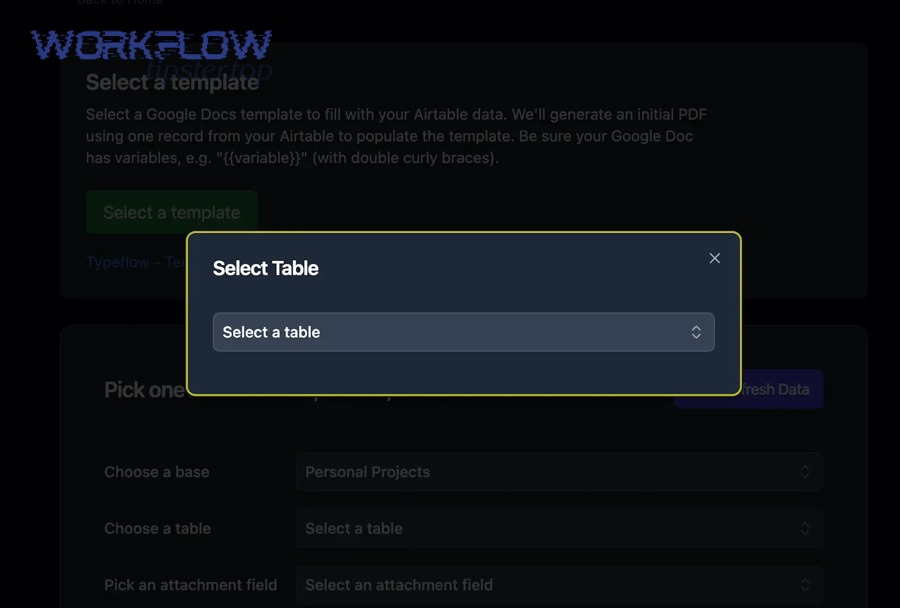
- Templates (template name, version, Slides template ID, required fields)
- Contacts/Signers (optional, if you reuse signers)
- Events/Logs (optional, for detailed event history)
Critical root fields in Requests
- Status (Draft → Ready → Previewed → Sent → Completed → Exception)
- Template (linked to Templates)
- Signer 1 name/email (and signer 2 if needed)
- Drive PDF URL
- Envelope ID
- Error message (long text)
- Last attempt time (date)
Trigger rule
- Only trigger automation when:
- Status = Ready
- Required fields are not empty
- Template version is selected
- Signer email is valid format
- Any internal approval checkbox is true
This is where many automation workflows succeed or fail: validation in Airtable prevents “garbage in, garbage out.”
Step 2: Build a Google Slides template for document generation
Build a Google Slides template by designing the document layout as slides (often a single slide sized like a page), then adding stable placeholders that your automation can replace with Airtable values.
Specifically, placeholders must be unique and predictable so replacements don’t accidentally alter the wrong text.
Template design tips
- Set page size to match your desired output (Letter or A4)
- Use consistent text styles for headings/body
- Avoid text boxes that auto-resize unpredictably
- Keep variable fields inside clearly bounded boxes
- If you need tables, build them carefully and test overflow
Placeholder examples
- {{CompanyName}}
- {{SignerName}}
- {{EffectiveDate}}
- {{TotalPrice}}
- {{AgreementID}}
A common technique is to duplicate the template, replace placeholders, then export to PDF—this is the same concept described in automation examples for generating Slides from structured data sources (even when the example uses Sheets instead of Airtable). (spreadsheet.dev)
Step 3: Export and store PDFs in Google Drive with controlled permissions
Export to PDF and store in Drive by saving the generated output into a restricted folder, applying least-privilege access, and writing the Drive link back to Airtable immediately.
Then, treat Drive as your “document vault,” not a casual file dump.
Practical Drive setup
- Create one shared drive or locked folder per department
- Use folder-level permissions for consistency
- Store drafts and completed files separately if needed
- Decide who can view vs edit vs share
Naming + metadata
- Use a deterministic file name so humans can find documents quickly
- Store the Drive URL in Airtable
- Store the Drive File ID (if your automation can capture it) for stability
Why this matters
- DocuSign should receive a stable, final PDF
- Operations needs a preview link for QA
- Auditors want evidence of the exact document version sent for signature
Step 4: Send the document to DocuSign and track envelope status back in Airtable
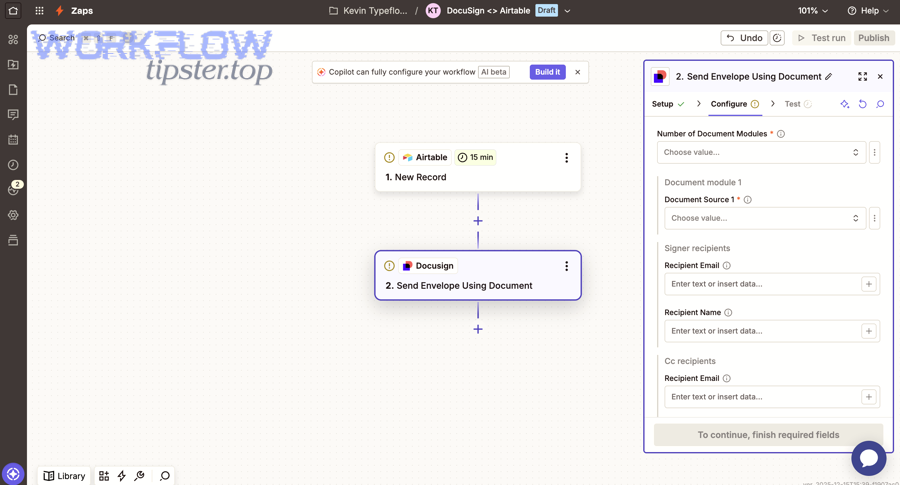
Send the PDF via DocuSign by creating an envelope with the right recipients and signing order, then store the envelope ID and status in Airtable so the record becomes your real-time tracker.
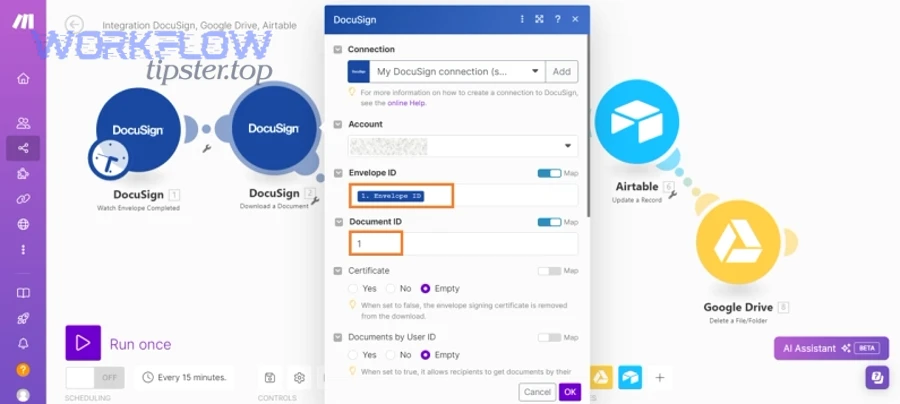
More specifically, the envelope ID is the “join key” that lets you reconcile DocuSign events back to the exact Airtable request.
Envelope configuration checklist
- Subject line includes Agreement ID and company name
- Message body includes context and next steps
- Recipients:
- Signer(s)
- CC recipients (optional)
- Approver role (if you use an approval step inside DocuSign)
- Signing order (if sequential signing is required)
- Reminder and expiration rules aligned to your policy
DocuSign’s developer documentation explains recipient concepts and statuses in the eSignature flow, which is useful when you map envelope updates back into your system of record. (developers.docusign.com)
Status syncing patterns
- Webhook (best): DocuSign Connect posts events to your endpoint, which updates Airtable
- Polling (fallback): periodically check envelope status and update Airtable
- Hybrid: poll only when the webhook fails or for reconciliation
Suggested Airtable statuses
- Sent
- Delivered
- Viewed
- Completed
- Declined
- Void
- Expired
- Error (with error reason)
Step 5: Handle exceptions, retries, and audit trails
Handle exceptions by logging failures with a clear error message, retrying only when the failure is transient, and keeping an audit trail of what was generated, when it was sent, and who approved it.
Next, build a “safe failure” design so one broken record doesn’t break your whole pipeline.
Common exceptions and responses
- Missing fields → revert Status to Draft and notify owner
- Slides generation failed → retry up to N times, then Exception
- Drive permission error → alert admin; do not send to DocuSign
- DocuSign send failed → capture error code; retry only if it’s a temporary outage
- Signer email bounced → mark Exception and route to operations for correction
Audit trail essentials
- Airtable record history (who changed status and when)
- Stored PDF link (final version sent)
- DocuSign envelope ID + completion certificate link (when completed)
- Internal approval checkpoints (if applicable)
If you operate in regulated environments, this discipline isn’t optional—it’s what turns a convenient automation into a defensible process.
Manual vs automated document signing in this workflow: which is better?
Manual signing wins in high-variance documents and last-minute edits, automated signing is best for speed and consistency at volume, and a hybrid approach is optimal when you need human approval gates but still want automated generation, storage, and DocuSign routing.
However, the “best” choice depends on your document standardization, compliance risk, and operational capacity to maintain the system.
Airtable-only manual export vs automated generation and sending
Airtable-only manual export is simpler but slower, while automated generation and sending removes repetitive work and improves tracking—at the cost of initial setup and ongoing maintenance.
More specifically, the tradeoff is time saved per document versus time invested in building and maintaining templates and integrations.
Manual approach
- Ops exports data, copy/pastes into a document, exports to PDF
- Uploads to Drive
- Creates DocuSign envelope manually
- Updates Airtable manually
Automated approach
- Ops sets Status = Ready
- System generates PDF and stores it in Drive
- System sends envelope in DocuSign
- System updates Airtable statuses
If you do fewer than ~20 documents/month, manual might be “good enough.” If you do hundreds, automation typically pays back quickly.
No-code connectors vs custom API: what are the tradeoffs?
No-code connectors win in speed-to-launch, while custom API wins in control, reliability, and advanced logic.
Meanwhile, most operations teams start no-code and move toward API only when scale or compliance requires deeper control.
No-code (Zapier/Make/n8n, etc.)
- Faster to build
- Easier for ops to adjust
- Limited customization in edge cases
- Can become brittle at high volume if retries and idempotency aren’t handled well
Custom API (Apps Script, Cloud Functions, middleware)
- Full control over placeholder logic, retries, and logging
- Stronger permission patterns (service accounts)
- More engineering effort and monitoring required
- Better long-term maintainability for complex organizations
If you’re already comfortable building automation workflows, a hybrid model is common: no-code for orchestration + a small script for the “hard parts” (Slides PDF generation, envelope creation with precise roles).
Automation vs “human-in-the-loop” approvals: when should you use a hybrid?
Automation should be fully hands-off for low-risk, standardized documents, but you should use human-in-the-loop approvals for high-risk agreements, high dollar amounts, or anything requiring compliance review.
More importantly, hybrid is often the best model because it prevents errors while still removing the most time-consuming manual tasks.
Here’s a simple comparison table showing what each approach optimizes for. (This table compares control, speed, auditability, and maintenance across manual, automated, and hybrid approaches.)
| Approach | Best for | Main advantage | Main risk | Typical control point |
|---|---|---|---|---|
| Manual | Low volume, high variability | Maximum flexibility | Slow and error-prone | Human review before sending |
| Automated | High volume, standardized docs | Speed and consistency | Bad data moves faster | Validation rules + monitoring |
| Hybrid | Regulated or high-risk docs | Balance of speed + safety | Added workflow steps | Approval gate before DocuSign |
A practical hybrid flow is:
- Generate PDF automatically
- Require a human “Preview Approved” checkbox in Airtable
- Only then send DocuSign automatically
This pattern also makes it easier to incorporate alternate chains later, such as automation workflows that include airtable to docsend to onedrive to dropbox sign document signing when you need controlled viewing, or airtable to docsend to google drive to docusign document signing when you want both tracked viewing and DocuSign execution.
What advanced practices make this document signing workflow reliable and scalable?
There are four advanced practices that make this workflow reliable and scalable: (1) security and least-privilege permissions, (2) template versioning and strict field mapping, (3) monitoring with retries and a reprocessing queue, and (4) extensibility patterns that let you add new document routes without rewriting everything.
Especially as volume grows, these practices turn a “cool automation” into a system your operations team can trust.
How do you ensure security, permissions, and least-privilege access?
Ensure security by restricting Drive folders, isolating service credentials, limiting who can trigger sends, and preventing oversharing of generated PDFs.
To illustrate, the biggest real-world risk is not DocuSign—it’s a Drive link shared too broadly or a template copied into the wrong folder.
- Use a dedicated Drive folder with limited editors
- Use view-only links where possible
- Store completed agreements in a more restricted archive
- Limit Airtable permissions so only authorized users can set Status = Ready
- Log who triggered an envelope send
How do you version templates and maintain field mappings?
Version templates by treating them like software releases: each template has a version ID, a changelog, and a controlled rollout process, and Airtable records store the exact template version used.
Next, enforce mapping discipline so a renamed Airtable field doesn’t silently break documents.
- Template table includes:
- Template Name
- Version
- Slides Template ID
- Required Fields
- Deprecation flag
- Only one “current” version is allowed
- Deprecate old versions instead of deleting them
- Use automated tests: generate a sample PDF weekly to confirm placeholders still render
How do you monitor failures and build a reprocessing queue?
Monitor failures by logging every run (success/failure), alerting on error spikes, and building a reprocessing queue that can retry safely without duplicating envelopes.
More specifically, you need idempotency: if the same Airtable record runs twice, the system should detect an existing envelope ID and avoid sending duplicates.
- Airtable fields:
- Attempt count
- Last attempt timestamp
- Error code/message
- “Reprocess” checkbox
- Automation rule:
- Only reprocess if Status = Exception AND Reprocess = true AND Attempt count < limit
- Duplicate prevention:
- If Envelope ID exists, don’t create a new one—query status instead
How do you extend the workflow to DocSend/OneDrive/Dropbox Sign scenarios?
Extend the workflow by keeping Airtable as the orchestration layer and swapping only the storage/viewing/signing modules—so you can add controlled viewing (DocSend), alternate storage (OneDrive), or a different e-sign vendor (Dropbox Sign) without rewriting your whole pipeline.
In addition, this modular thinking is exactly how teams evolve from one flow to multiple flows as needs diversify.
- You might keep Slides generation but store outputs in OneDrive for Microsoft-centric teams.
- You might insert DocSend before signing when you need tracked viewing and stakeholder analytics.
- You might route certain document types to Dropbox Sign when vendor requirements demand it.
That’s why naming the chain explicitly inside your documentation matters: it keeps your team aligned when you operate multiple automation workflows in parallel.