


Turning a text-first Google Doc into a presentation-ready Google Slides deck is fastest when you treat “conversion” as a content-to-structure workflow: you extract the right ideas, map them to slide titles and layouts, and then apply consistent visual hierarchy.
The quickest path depends on your constraints. If your Doc is already well-structured with headings and short sections, manual transfer can be surprisingly fast and gives you total control over design decisions like slide density, emphasis, and pacing.
If your priority is speed at scale—like recurring meeting notes, lesson plans, or weekly reports—Doc-to-Slides tools and add-ons can generate a first draft in minutes, and you then polish for clarity and brand consistency.
Introduce a new idea: before you move a single sentence, you’ll get better slides by preparing the Doc for slide logic—because a great deck is not a long document pasted onto slides, but a sequence of decisions your audience can follow.
Can you directly “convert” Google Docs to Google Slides in one click?
No—there isn’t a true one-click “Google Docs to Google Slides” conversion that reliably produces presentation-ready slides, because Docs and Slides use different layout models, different reading behaviors, and different rules for hierarchy and visual emphasis.
Then, to make the outcome predictable, you want to choose a method that matches your goal: speed, control, or repeatability.
A document is designed for continuous reading. It rewards detail, nuance, and complete sentences. A slide deck is designed for scanning while listening. It rewards structure, restraint, and visual cues. When you “convert,” you’re not just moving text—you’re translating a reading experience into a presentation experience.
That translation is why many people try copy/paste and feel disappointed: the content arrives, but the meaning doesn’t land. Your audience needs a headline that tells them what to think, a supporting visual that shows why, and a short set of bullets that prove it—one idea per slide.
What does “Google Docs to Slides conversion” actually mean?
Google Docs to Slides conversion is the process of transforming document content into slide structure—usually by mapping headings into slide titles, breaking paragraphs into bullets, and turning supporting details into visuals or speaker notes.
Next, once you treat conversion as “structure first,” you can control slide flow instead of fighting formatting.
In practice, conversion includes three repeatable moves:
- Extract the spine of the story: your headings, section titles, and key claims.
- Translate the spine into slide titles: each slide title becomes a complete thought, not a topic label.
- Place supporting details strategically: bullets for scan-friendly points, visuals for relationships, and speaker notes for nuance.
A helpful mindset is this: a Doc stores everything you know; a deck highlights what your audience must remember. If you keep that distinction clear, every later step becomes easier—because you stop trying to preserve every sentence and start trying to preserve the meaning.
When should you skip conversion and just link to the Doc instead?
Linking to the Doc wins when you need a living reference, while converting to Slides wins when you need a timed, spoken narrative—so choose based on update frequency, audience behavior, and decision urgency.
However, when your audience needs both, you can combine the approaches without duplicating work.
Skip conversion and use a link when:
- The document changes often (weekly updates, collaborative drafts, evolving specs).
- The audience must read details later (policies, procedures, contracts, deep research).
- You want a single source of truth and fewer version-control headaches.
Convert to Slides when:
- You must guide attention step-by-step (training, pitching, reporting outcomes).
- You’re presenting live and need pacing (one point at a time).
- You need visual hierarchy to land key decisions (priority, risk, tradeoffs).
A hybrid tactic works well: use Slides for the talk track, and add a “Read the full Doc” link on the title slide and closing slide. That keeps your deck clean and keeps your Doc authoritative.
What should you prepare in Google Docs before moving it into Slides?
There are 6 main preparation moves you should make in Google Docs—outline your sections, tighten paragraphs, convert sentences into bullets, label visuals, simplify tables, and mark speaker-note material—based on the criterion of “slide readability under time pressure.”
To begin, these moves reduce reformatting time because they turn a Doc into slide-ready building blocks.
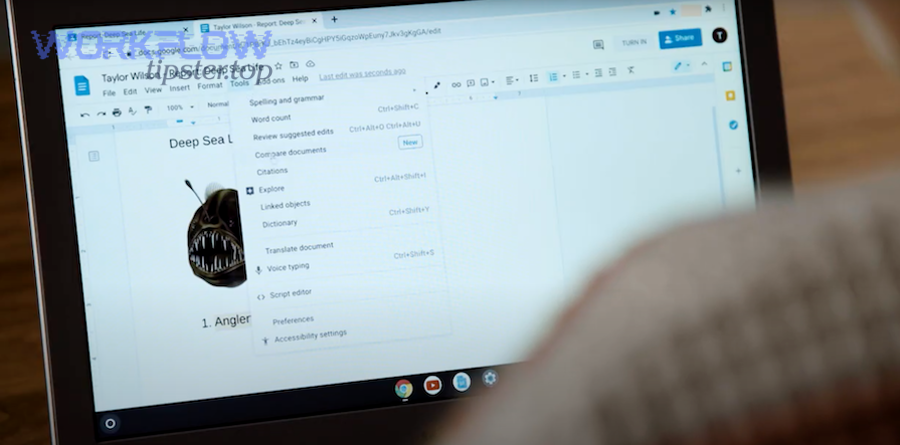
Preparation is where “faster conversion” actually happens. If you invest 10–15 minutes fixing structure in the Doc, you save 30–60 minutes fixing mess in Slides.
Here’s the practical checklist you can use before you paste anything:
- Make headings do real work: each section heading should represent one slide or one cluster of slides.
- Cut long paragraphs: if a paragraph is more than 3–4 lines, it probably becomes multiple slides or speaker notes.
- Rewrite into bullets: convert sentences into short, parallel bullet phrasing.
- Mark visuals explicitly: add bracket notes like “[Insert chart: revenue trend]” so visuals don’t get forgotten.
- Simplify tables: decide what the slide needs (the takeaway), not what the table contains (all cells).
- Tag speaker notes: label details you must say aloud but don’t want on screen.
How do headings and the document outline help you build slide titles fast?
Headings and the document outline act as a ready-made slide map because they already encode hierarchy—so you can turn each H2/H3 into a slide title, and each subsection into a slide sequence.
Specifically, once headings reflect your “one idea per slide” intent, your deck practically assembles itself.
If you want your Slides to feel organized, your Doc must be organized in a way Slides can inherit. The quickest approach is to use this mapping:
- Doc Title → Deck Title slide
- H2 sections → Main slide titles (one per section)
- H3 subsections → Supporting slides (one per subsection)
- Bullets under headings → Slide bullets
- Long explanations → Speaker notes
A slide title should be a claim, not a label. For example, instead of “Results,” use “Q4 revenue grew 18% because churn dropped.” A claim-based title gives the audience an immediate interpretation.
When you do this in the Doc first, your conversion becomes mechanical: copy the heading → paste as title → copy bullets → paste as body. The thinking is already done.
What content should be grouped into “one slide” vs split across multiple slides?
A single slide should contain one primary message, while content should split across multiple slides when it includes multiple claims, multiple audiences, or multiple time sequences—because slide comprehension relies on scanning, not reading.
Moreover, splitting improves pacing and prevents “wall-of-text” slides that audiences ignore.
Use one slide when:
- The bullets support a single claim.
- The visual explains one relationship .
- The audience can read and listen without choosing between them.
Split into multiple slides when:
- You have more than 5–6 bullets.
- You have more than one concept (problem + solution + impact all at once).
- You need a sequence (Step 1, Step 2, Step 3) that deserves time.
A strong rule of thumb is the “10-second scan test”: if someone can’t tell what the slide means in 10 seconds, it needs a rewrite or a split. The goal is not to shrink content—it’s to clarify meaning.
How do you manually turn a Doc into a Slides deck quickly?
Manual conversion works best when you follow 7 steps—prepare headings, create a slide skeleton, paste with the right method, apply layouts, rebuild visuals, add speaker notes, and run a polish pass—so you can turn a Doc into a clean first draft fast.
Next, the key is choosing paste behavior that protects consistency rather than copying chaos.
Here’s the fastest manual workflow that stays clean:
- Create a slide skeleton first
Open a new deck (or the target deck) and create slides based on your Doc outline. Add only slide titles at this stage. This prevents random formatting from dictating your structure. - Paste content into the right layout
Use title + body layouts for bullet slides, and title-only layouts for visual slides. Layout-first prevents you from fighting text boxes later. - Choose a paste method intentionally
Decide whether you want Slides to inherit Doc formatting or adopt the deck’s theme. Most of the time, adopting the deck’s theme is faster. - Convert paragraphs into bullets
Even if your Doc is cleaned up, you’ll still need to ensure bullets are short and parallel. Slides punish long sentences. - Rebuild visuals
If the Doc contains images, charts, or tables, treat them as “slide assets,” not “pasted objects.” Insert or recreate them in Slides so they scale properly. - Move details to speaker notes
Keep the screen clean. If you need to say it, put it in notes. - Do a 5-minute deck scan
Run through in Present mode, watching for overcrowded slides, inconsistent alignment, and tiny fonts.
If you want a visual walkthrough while you work, you can follow a tutorial video once and then reuse the same method every time:
Which paste method should you use to avoid messy formatting?
Pasting without carrying Doc styling usually wins for deck consistency, while pasting with source formatting wins for speed on one-off drafts—so choose based on whether you prioritize brand consistency or immediate text transfer.
However, you can combine both approaches slide-by-slide to get the best of each.
A practical decision guide:
- Use “paste without formatting” (or plain text behavior) when
- You already have a deck theme you want to enforce.
- You want consistent fonts, sizes, and spacing.
- You’re converting many sections and want speed later, not now.
- Use “keep source formatting” when
- The Doc is already styled exactly how you want.
- You’re building a quick internal deck and consistency is secondary.
- You’re pasting content that’s already bullet-structured and minimal.
Even when you paste without formatting, your time is not lost. You’re buying consistency. Slides becomes easier when every body text box behaves the same way—same line spacing, same indentation, same font size.
If you want a “fast but safe” approach: paste without formatting first, then use bolding sparingly to emphasize key words. That keeps the slide readable and avoids the “rainbow formatting” problem that happens when multiple Doc styles collide.
How do you handle images and tables from Docs when moving to Slides?
There are 4 main ways to handle Doc visuals—reinsert images cleanly, recreate tables as slide-friendly summaries, convert complex tables into charts, or use an appendix approach—based on the criterion of readability from a distance.
In addition, choosing the right method prevents pixelation, cramped layouts, and misaligned content.
Images
- Best practice: download or copy the original image asset and insert it into Slides as an image, then scale it intentionally. This keeps quality and alignment predictable.
- If the image is informational: add a short caption or callout to highlight the takeaway, not just the picture.
Tables
Tables are almost always too dense for slides. Slides prefer interpretation, not raw data. Use one of these options:
- Slide summary table: 3–5 rows, 2–3 columns, only the variables that matter.
- Chart conversion: if the table shows trend or comparison, a chart communicates faster.
- Split-table strategy: one slide per category (e.g., “North America,” “EMEA,” “APAC”) instead of one mega-table.
- Appendix strategy: keep the full table in the final slides as backup, and show only the summary during the talk.
A strong workflow is: slide shows the conclusion, appendix stores the evidence. That keeps presentations persuasive without hiding data.
Which add-on method is best for converting Google Docs to Slides?
Manual conversion wins for design control, add-ons win for repeatable speed, and AI generators win for instant first drafts—so the best method depends on whether your top priority is consistency, automation, or rapid ideation.
Meanwhile, the most important rule is to treat any generated deck as a draft that still needs human slide judgment.
This is where “faster” gets real for teams. If you do recurring conversions—weekly updates, training docs, internal playbooks—add-ons can save time. But you still need a decision framework so you don’t trade speed for messy decks.
Before the table, here’s what it contains: the table compares manual, add-on, and AI approaches across speed, control, formatting consistency, and best-fit scenarios, so you can choose the conversion method that matches your constraints.
| Method | Speed | Design control | Formatting consistency | Best for |
|---|---|---|---|---|
| Manual (copy/paste + layouts) | Medium | High | High (if theme-based) | Client decks, brand-sensitive decks, high-stakes presentations |
| Add-on (Doc → Slides generator) | High | Medium | Medium | Recurring internal decks, lesson plans, meeting notes |
| AI generator (Doc link → deck draft) | Very high | Low–Medium | Low–Medium | Brainstorming, first drafts, outline-to-deck acceleration |
Now let’s connect this to your situation: if you want the deck to look “designed,” manual wins. If you want the deck to exist quickly and you can accept a polish pass, add-ons and AI can be worth it.
And this is also where broader Automation Integrations become relevant: many teams standardize their internal reporting so that a Doc (or form submission) becomes a deck, then tasks and follow-ups flow into project tools—similar in spirit to workflows like google calendar to asana scheduling pipelines or intake automation such as google forms to airtable for structured reporting. In other words, Doc-to-Slides is often one link in a bigger automation chain.
What are the main categories of Doc→Slides tools you’ll find?
There are 3 main categories of Doc→Slides tools—Workspace add-ons, AI presentation generators, and script-based automation—based on how they ingest content and how much control they provide over slide structure.
Next, once you know the category, you can predict what the tool will do well and what it will do poorly.
- Workspace add-ons
These typically run inside Docs or Slides and generate slides from headings and text blocks. They’re best for text-heavy decks and repeatable workflows. - AI presentation generators
These usually accept a Doc link or pasted text and output a designed draft. They’re best for speed and ideation, but you must verify facts and tune structure. - Script-based automation (advanced)
These parse Docs and programmatically create Slides (often with templates). They’re best when you need a consistent output at scale—like generating decks for many teams or many clients.
A simple selection principle: the more automation you want, the more you should standardize the input Doc format (headings, consistent sections, labeled assets).
How do manual vs add-on methods compare for speed, control, and formatting?
Manual wins in control, add-ons win in speed, and scripts win in repeatability—so your optimal choice is the one that matches your main constraint: time, design quality, or scale.
Besides, your “hidden cost” is often the cleanup time after generation.
To compare properly, use these criteria:
- Speed (time-to-first-draft)
- Add-ons and AI are fastest for draft creation.
- Manual is slower upfront but can be faster overall when you need fewer fixes.
- Control
- Manual is strongest: you control spacing, emphasis, and layout.
- Add-ons provide structure but may output generic layouts.
- AI may “design” but not match your standards.
- Consistency (brand theme + layout rules)
- Manual with a theme is the most reliable.
- Add-ons vary depending on how they map formatting.
- AI varies widely and often needs a theme pass.
A useful mindset is: automation generates content placement; you still own communication quality. The tool can move text, but it can’t decide which words deserve the slide and which belong in notes.
How do you polish the converted slides so the deck looks “presentation-ready”?
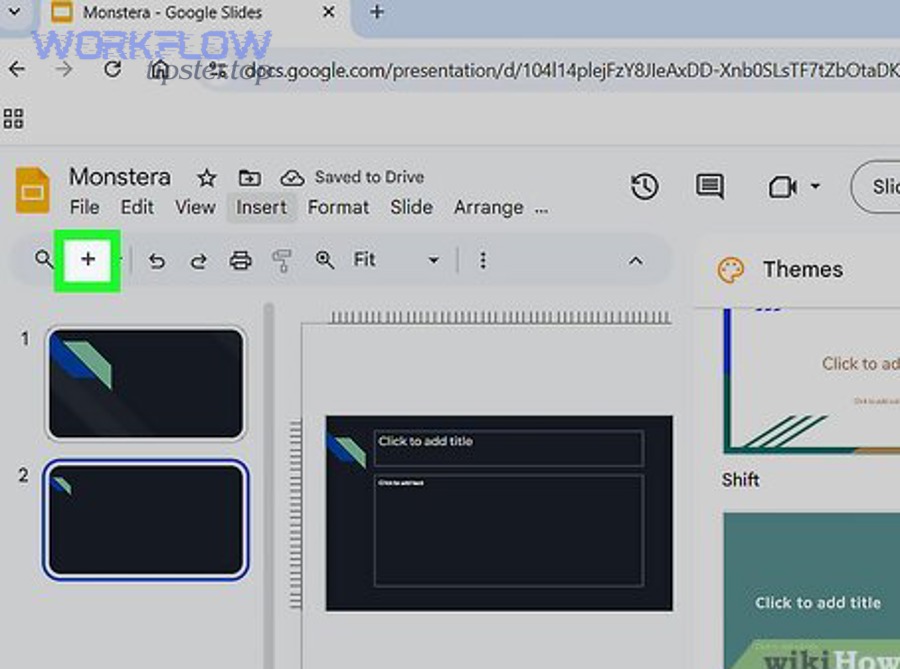
You polish converted slides by applying a theme, enforcing consistent layouts, tightening slide density, upgrading visuals, and validating presentation behavior—so the final deck reads cleanly in 10 seconds per slide and supports your spoken narrative.
More importantly, polishing is where you convert “a draft deck” into “a persuasive deck.”
Polish is not decoration. Polish is decision clarity. Your audience should never wonder:
- “What is this slide about?”
- “Where should I look?”
- “Why does this matter?”
So polishing focuses on hierarchy, not ornament.
What formatting rules make a Doc-based deck readable on slides?
There are 7 core formatting rules for Doc-based decks—one claim per slide, short bullets, strong headings, consistent spacing, readable font sizes, visual support, and restrained emphasis—based on the criterion of scan-and-listen comprehension.
To illustrate, these rules reduce cognitive load and increase recall because the audience can follow the story without reading paragraphs.
1) One claim per slide
If you can’t summarize the slide in one sentence, the slide is doing too much.
2) Bullets are phrases, not paragraphs
Use parallel phrasing. Start bullets with the same part of speech when possible.
3) Titles say the takeaway
Replace topic titles (“Benefits”) with conclusion titles (“Automation cut prep time by 40%”).
4) Use spacing as structure
Whitespace is not wasted; it is meaning. Separate groups so the audience sees relationships instantly.
5) Use readable font sizes
A slide isn’t a document page. If you must shrink the font to fit it, you should split the slide.
6) Replace dense text with visuals
Trends become charts. Processes become diagrams. Comparisons become tables with highlights.
7) Emphasis is rare
Bold only what is essential. Over-highlighting destroys hierarchy.
If you follow only one rule, choose this: a slide is not meant to contain everything you know—only what the audience must notice.
How do you verify the final deck won’t break when shared or presented?
Yes—you can reliably verify a converted deck won’t break by running a 3-part check: presentation view behavior, sharing permissions, and export stability, because these catch layout drift, missing assets, and access failures before your meeting.
In short, verification is your final insurance against “it looked fine on my screen.”
Run this checklist:
A) Present-mode behavior (the “live” test)
- Titles are readable without squinting.
- Bullets do not overflow.
- Images are sharp, not blurry or stretched.
- Animations (if any) do not distract or hide key points.
B) Sharing and access (the “audience” test)
- Your audience has the right permissions (view/comment/edit).
- Links in the deck open correctly.
- Embedded or linked assets are accessible to viewers outside your domain, if needed.
C) Export stability (the “backup” test)
- Export to PDF and check for shifted elements.
- If you must export to PPTX, verify fonts and spacing are acceptable.
- Confirm that speaker notes appear where you expect (or are excluded if confidential).
According to a study by Penn State University from the College of Engineering, in 2013, an experiment with 110 engineering students found that slides designed to follow multimedia learning principles (assertion–evidence style) produced superior comprehension and stronger delayed recall than common-practice slides.
What are the most advanced ways to automate Google Docs to Google Slides beyond copy/paste?
There are 4 advanced automation paths—add-on generation, AI drafting, template-driven pipelines, and script-based slide creation—based on the criterion of “repeatable output with minimal cleanup.”
Next, if you choose the path that matches your volume and standards, you can reduce slide creation time without sacrificing clarity.
Advanced automation is not about skipping thinking. It’s about standardizing the parts that shouldn’t require thinking every time—like slide skeletons, consistent layouts, and predictable input formats.
The best results come when you pair automation with a standardized Doc structure, such as:
- Fixed section headings (Problem, Context, Recommendation, Next steps)
- Consistent bullet style
- Clearly labeled visual placeholders
- Optional speaker note blocks
That kind of standard input allows automation to behave consistently, which is what most teams actually want.
Which Google Workspace add-ons can generate slides from a Doc, and when are they worth it?
Add-ons are worth it when you repeatedly convert similarly structured Docs into Slides and want faster drafts, but manual work is better when every deck is unique and design quality is the main differentiator.
Then, the key decision is whether the add-on saves time after you include cleanup.
Add-ons tend to pay off in scenarios like:
- Weekly team updates that follow the same template
- Lesson plans where each section becomes a slide
- Meeting notes that become recap decks
- Internal documentation decks for onboarding
They’re less valuable when:
- Your deck must match strict brand standards
- The story requires custom pacing and visuals
- Your Doc is not structured and would need cleanup anyway
If you want add-ons to be “worth it,” you must treat the Doc as structured input—because automation can’t guess your hierarchy if your Doc doesn’t have one.
How do AI “Doc-to-presentation” tools differ from add-ons in output quality and editing workload?
AI tools are faster for creating a designed first draft, while add-ons are more predictable for structured text transfer—so AI tends to require more factual review and narrative tightening, and add-ons tend to require more layout refinement.
However, both can be effective when you apply a disciplined polish pass.
AI tools typically shine when:
- You have an outline but no time to design a first pass
- You need quick variations of structure (Version A vs Version B)
- You’re turning a concept note into a narrative deck
AI tools require caution when:
- Accuracy matters (numbers, claims, citations)
- You have compliance constraints
- You must use precise terminology consistently
The best workflow is: AI generates the draft → you validate accuracy → you enforce theme and hierarchy → you rewrite slide titles as clear claims.
Can you use Apps Script to create Slides from a Doc outline for bulk workflows?
Yes—you can use Apps Script to parse a Doc’s heading structure and generate Slides programmatically, which is useful when you need bulk, template-consistent decks across teams or recurring cycles.
Besides, scripting becomes valuable only when you have standardization, because scripts rely on patterns.
Script-based automation is a “scale” solution. It makes sense when:
- You generate many decks from similar Docs
- You want consistent layout rules enforced automatically
- You need to append slides into a central deck
- You want to integrate with a broader workflow (e.g., auto-create deck → notify team → archive the source)
But it’s rarely the best first solution for individuals. Most people get 80% of the benefit by standardizing their Doc format and using a repeatable manual workflow—or a simple add-on—before they invest in scripting.
What’s the best alternative when you don’t want to convert at all—linking, attaching, or referencing the Doc?
Linking to the Doc is best for living documents and detailed reading, while converting is best for guided presentations—so the best alternative is often a “Slides deck + Doc link” approach that preserves one source of truth without duplicating content.
To sum up, the goal is to match the medium to the behavior you expect from your audience.
A practical “no conversion” strategy:
- Use a clean title slide with context and agenda
- Include a “Read the full Doc” link early
- Present only the key decision slides (3–7 slides)
- Close with next steps and link again
This approach works especially well when the Doc contains deep detail that would ruin slide readability. You keep the presentation persuasive, but you keep the documentation complete.
And if you’re building repeatable workflows inside a team, you can treat this like a standardized operating rhythm—one that sits alongside other operational pipelines you might already use, such as google calendar to asana workflows for task scheduling or google forms to airtable setups for collecting structured inputs. The common principle is the same: standardize the input, automate the transfer, and keep humans responsible for communication quality.