


Connecting (integrating) Calendly to Microsoft Teams means Calendly will automatically generate a unique Teams meeting link for each booking and place it into the calendar invite and confirmation messages so invitees can join with one click instead of manual setup.
You’ll also learn how to validate that the link is actually being created and delivered end-to-end, because “connected” does not always mean “configured correctly” when the event location, organizer permissions, or account selection is off.
Next, we’ll cover the practical requirements and limitations that decide whether Teams conferencing works smoothly—especially which Microsoft account types and sign-in behaviors typically cause missing links or repeated “Action required” prompts.
Introduce a new idea: once the core conferencing link flow is correct, you can extend the setup with Teams chat notifications and broader workflow automation so scheduling changes become visible to the whole team without extra tool switching.
What does it mean to “connect (integrate) Calendly to Microsoft Teams” for auto-adding meeting links?
Connecting Calendly to Microsoft Teams means Calendly becomes the system that creates a new Teams meeting for each scheduled event and automatically injects the join link (and conferencing details) into the invite your calendar sends to the organizer and invitee.
To better understand why this matters, it helps to separate integration (accounts are connected) from configuration (your event types are set to use Teams as the location), because the second part is what actually makes meeting links appear consistently.
Does Calendly automatically create a Microsoft Teams meeting link for every booking once connected?
Yes—Calendly can automatically create a Microsoft Teams meeting link for every booking once connected because it (1) generates unique conferencing details per event, (2) attaches the link to the calendar invite and confirmations, and (3) keeps meeting details updated when a meeting is rescheduled.
However, this “automatic” behavior only becomes reliable when you treat Teams as the default location for the event type, because the location field is the switch that tells Calendly to create a Teams conference rather than leaving the invite without video details.
More specifically, the biggest benefit is consistency: the organizer does not need to open Teams, create a meeting manually, copy/paste the join URL, and then hope the correct link gets sent to all participants. When you scale beyond one-off meetings into daily scheduling, manual link creation becomes a recurring failure point: wrong link, wrong time, wrong attendees, or no link at all.
To make this practical, evaluate your current workflow with three quick questions:
- Do you currently create Teams links manually? If yes, you have a repeatable task to automate.
- Do invitees sometimes ask “Where’s the link?” If yes, the invite payload is inconsistent.
- Do reschedules create confusion? If yes, the handoff between scheduling and conferencing is fragile.
A well-configured Calendly ↔ Teams setup reduces those failure modes because the conferencing details follow the meeting throughout its lifecycle: scheduled → rescheduled → canceled.
What exactly gets added to the invite when the integration is working correctly?
When the integration is working correctly, the invite includes Microsoft Teams conferencing details: a unique join link and related meeting join options embedded in the event information that your calendar delivers to both organizer and invitee.
Next, focus on where you should see that information, because users often check only one surface and assume the integration failed.
In real-world usage, the same meeting can show up in multiple places, and each place may render details differently:
- Calendar invite (organizer’s calendar): usually the richest details because it’s the source object.
- Calendar invite (invitee’s calendar): should include the same join link if the invite was sent correctly.
- Confirmation email (invitee): often includes the join link in a readable “join meeting” format.
- Confirmation email (organizer): may show the same, depending on your notification settings.
To illustrate the “expected state,” you want invitees to be able to join even if they don’t have Teams installed—because many external guests use the browser join flow.
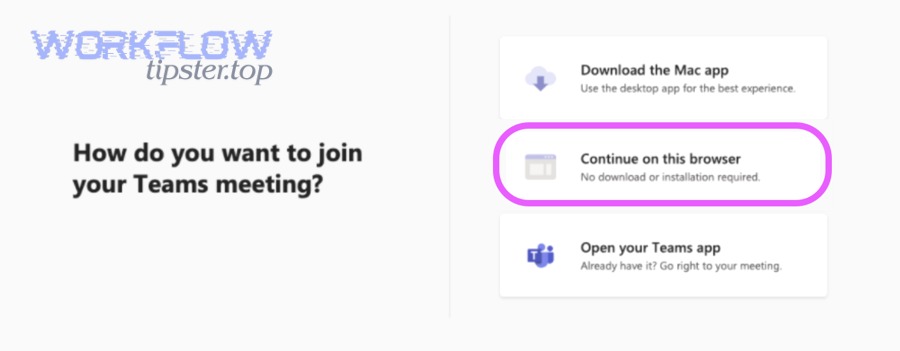
If your goal is a Teams-first experience for internal users but frictionless access for external guests, the integration’s value is that it standardizes the join path without requiring you to coach invitees on setup every time.
How do you set up Calendly + Microsoft Teams conferencing so links are auto-added to events?
Set up Calendly + Microsoft Teams conferencing by connecting your Teams account, selecting Microsoft Teams as the event location, and running a test booking—three steps that result in an automatically generated join link being added to the calendar invite and confirmations.
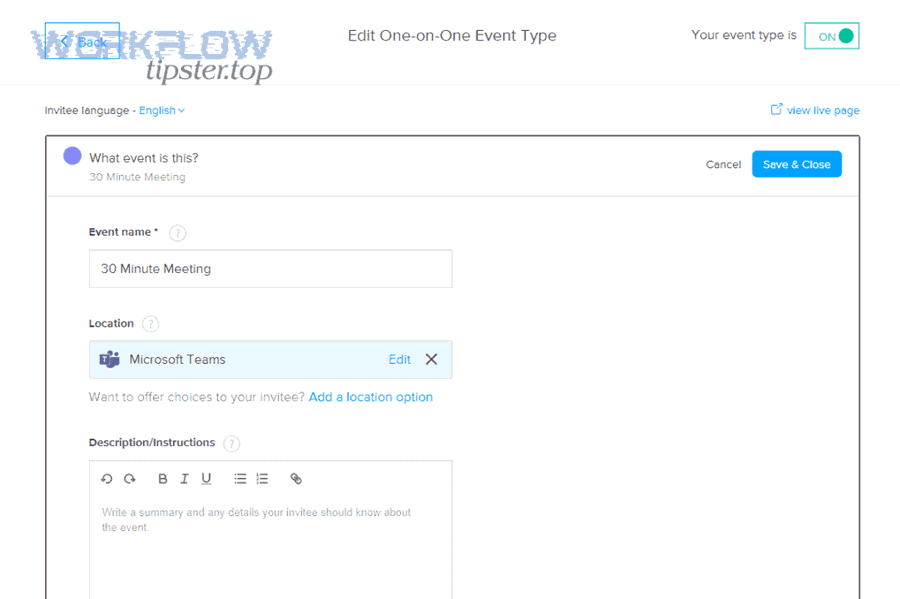
Then, treat setup as a “two-layer” process—connection and event-type configuration—because most failures happen when people stop after connecting the account.
Here’s a clear setup flow your team can repeat:
- Connect Microsoft Teams conferencing in Calendly
- Sign into Calendly with the account that owns the scheduling link.
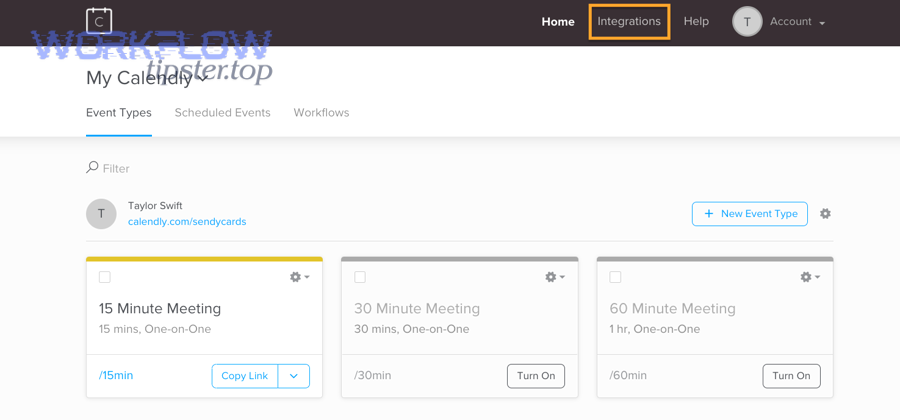
- Open Integrations, choose Microsoft Teams conferencing, and complete the Microsoft sign-in flow.
- Confirm the integration shows as connected.
- Configure the event type location to Microsoft Teams
- Open the event type(s) you use for meetings.
- In the location settings, choose Microsoft Teams.
- Save changes so future bookings inherit the Teams location automatically.
- Test end-to-end
- Book a meeting with a second email address (or a coworker) to simulate a real invitee.
- Confirm the calendar invite contains the Teams join link.
- Confirm any relevant confirmation emails also include the join details.
Which Calendly settings must you configure so “Microsoft Teams” becomes the event location by default?
There are 3 main settings areas you must configure so Microsoft Teams becomes the default location: (1) the Teams conferencing integration connection, (2) the event type’s location selection, and (3) the test-and-verify checklist that confirms the join link is present in real invites.
Below is the practical checklist, ordered from “most likely to break” to “easiest to confirm,” because fixing the top items usually resolves the problem immediately.
1) Integration connection (account level)
- You are connected to the correct Microsoft account (especially if you have multiple tenants).
- The integration shows as connected inside Calendly.
- You can disconnect/reconnect cleanly without errors.
2) Event type location (event level)
- The event’s location is set to Microsoft Teams, not “Custom,” not “Phone call,” and not a plain text link.
- The event type that people actually use is the one you edited (teams often have multiple similar event types).
3) Calendar + notification surfaces (delivery level)
- The organizer’s calendar invite includes the join link.
- The invitee’s calendar invite includes the join link.
- If your workflow relies on confirmation emails, those also display the link.
If you manage multiple meeting types (sales call, internal sync, candidate interview), standardize the location setting across your most-used event types first. That single move usually eliminates 80% of “missing link” complaints because it removes human variation.
How can you test the integration end-to-end in under 5 minutes (booking → invite → link)?
There are 4 quick tests you can run in under 5 minutes: (1) book a fresh event, (2) verify the invite link, (3) reschedule and confirm link continuity, and (4) cancel and confirm clarity—so you know links are created and carried through lifecycle changes.
Next, use this exact test script so your results are unambiguous.
Test 1 — Fresh booking (creation)
- Open your scheduling link in an incognito window.
- Book the earliest available slot.
- Check the organizer calendar invite: confirm a Teams join link exists.
Test 2 — Invitee view (delivery)
- If possible, book using an alternate email you can access.
- Open the invite in the invitee calendar: confirm the same link appears.
- Open the invitee confirmation email (if enabled): confirm link visibility.
Test 3 — Reschedule (continuity)
- Reschedule the meeting to a different time.
- Confirm the new calendar entry still has Teams conferencing details.
- Confirm the invite was updated rather than leaving the old link behind.
Test 4 — Cancel (clean end state)
- Cancel the meeting.
- Confirm the cancellation message is clear and doesn’t confuse participants with an “old link that still works.”
If all four tests pass, you’re not just “connected”—you’re operational. That’s the standard you want before rolling it out to a whole team.
What are the requirements or limitations for using Calendly’s Microsoft Teams conferencing integration?
There are 4 main requirement groups for Calendly’s Microsoft Teams conferencing integration: account eligibility, Microsoft account type, permissions/sign-in hygiene, and configuration scope across event types—each of which can prevent links from being generated if missed.
To better understand the limitations, separate what is “policy-based” (account type, admin controls) from what is “process-based” (wrong account connected, event types not updated).
Here’s the requirement breakdown that covers most environments:
1) Account eligibility (Calendly side)
- The integration must be available to your plan and user type.
- Your user profile must have permission to add integrations (especially in managed team accounts).
2) Microsoft account type (Teams side)
- Many organizations require Microsoft 365 Business or Office 365 Education accounts for Teams conferencing to work cleanly in third-party scheduling tools.
- Personal Microsoft accounts can behave differently depending on organization policy and tenant setup.
3) Permissions and access (admin + user)
- Some tenants require admin consent for third-party apps.
- Some users have Teams but cannot create meetings via API integrations due to policy.
4) Configuration scope (event types + ownership)
- Only event types configured to use Teams as the location will generate Teams links.
- If multiple organizers share event types, each organizer may need to connect their own Teams account, depending on how the team account is structured.
Is Microsoft Teams conferencing available on all Calendly plans and for all users?
Yes—Microsoft Teams conferencing can be available across plans and users because it is positioned as a core video conferencing integration, and Calendly’s own guidance indicates broad plan support, including free-tier availability in many setups.
However, the practical constraint is not always the Calendly plan—it is usually Microsoft tenant policy or the event type’s location configuration.
More importantly, teams often confuse “integration exists” with “integration is active,” which is why your rollout should include a standardized event-type template and a short verification checklist.
To reduce surprises during rollout, do this before inviting the whole org:
- Have two different users (one admin, one non-admin) connect Teams and run the 4-part test.
- Confirm that links appear for both users in both organizer and invitee views.
- Document the “expected invite” so support requests can be resolved quickly.
What permissions or account prerequisites most commonly prevent the connection from completing?
The most common blockers are (1) admin consent restrictions, (2) signing into the wrong Microsoft tenant, and (3) browser/session conflicts that keep reconnecting the old account—three issues that stop Teams links from being generated even when Calendly looks connected.
Next, treat these blockers as “diagnostic categories,” because each category has a different fix.
Category A — Admin consent / app policies
- Symptom: connection fails, or you see repeated prompts for approval.
- Fix: request admin approval for the Calendly Teams integration in your Microsoft tenant.
Category B — Wrong account connected
- Symptom: meeting links generate, but under the wrong organizer identity—or not at all for the intended user.
- Fix: disconnect Teams integration, clear cookies, and reconnect while signed into the correct Microsoft account.
Category C — Session conflicts
- Symptom: you reconnect but it keeps defaulting to the same Microsoft account.
- Fix: incognito window for reconnection, and sign out of other Microsoft sessions first.
Category D — User policy limitations
- Symptom: Teams works normally in-app, but conferencing links fail to generate via integration.
- Fix: check Teams meeting creation policies; some orgs restrict API-based meeting creation.
If your organization uses strict identity controls, the “wrong account connected” problem is the most common because many employees are signed into multiple Microsoft profiles simultaneously.
Why is the Microsoft Teams link missing after setup, and how do you fix it?
You fix a missing Microsoft Teams link by running a 5-checkpoint diagnostic—location selection, correct connected account, event-type scope, reschedule behavior, and delivery surface—because most “missing link” cases come from a single mismatch in one of those checkpoints.
Then, handle fixes in the same order the link is created: configuration first, delivery second, edge cases last.
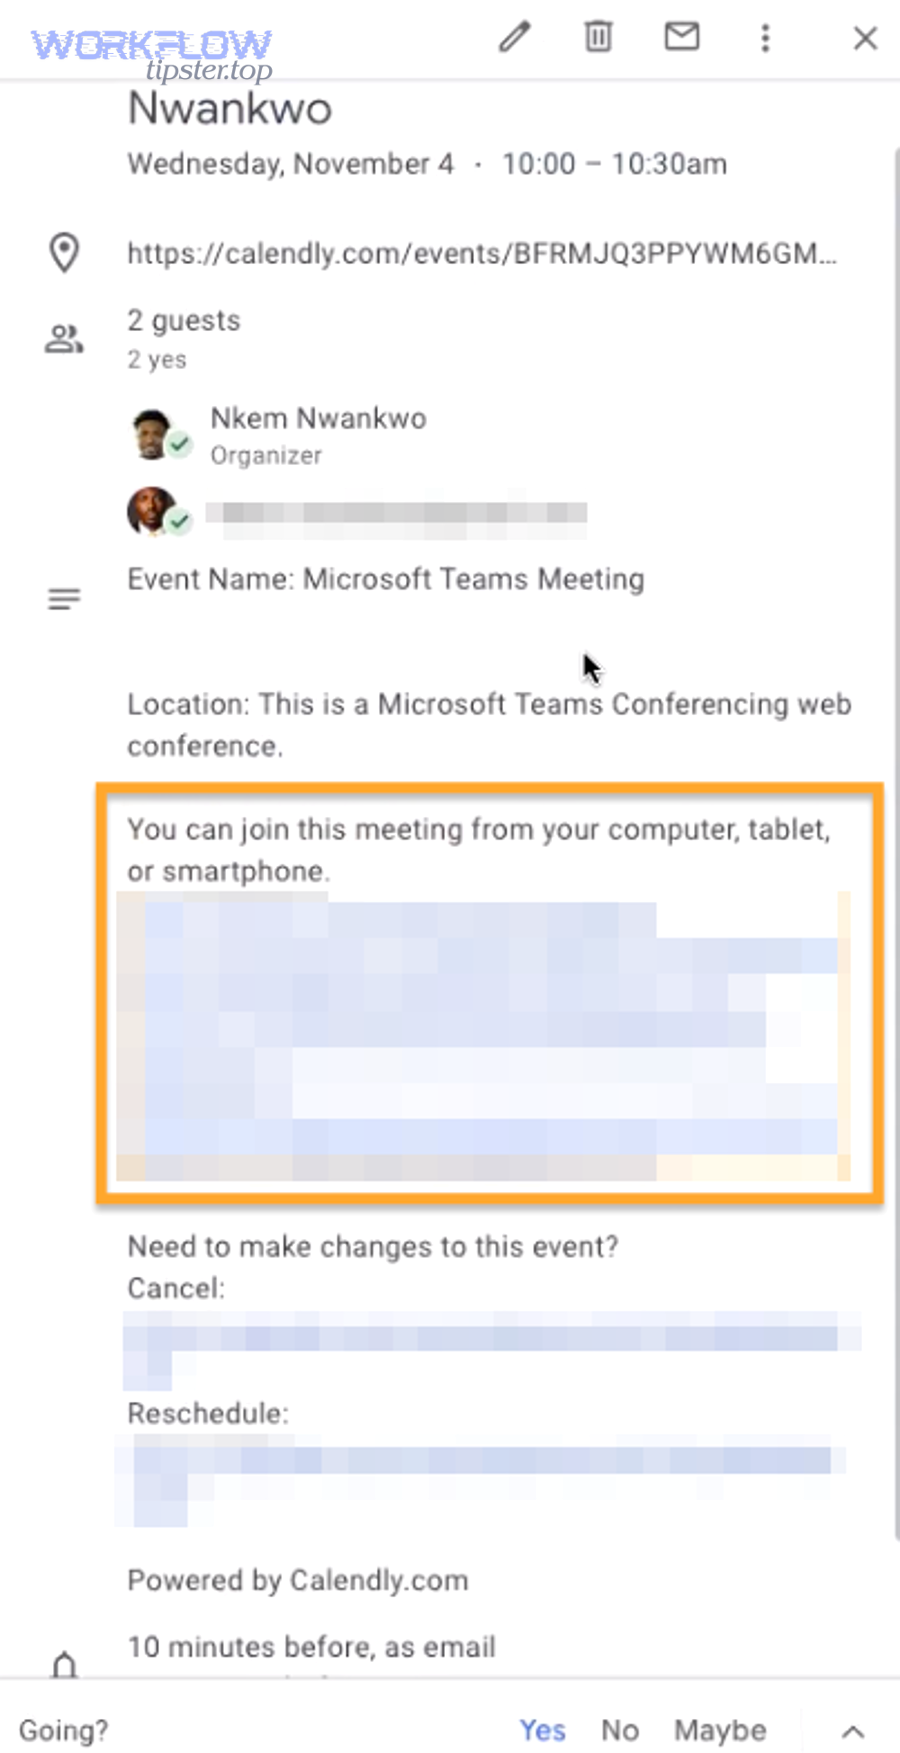
Is “Microsoft Teams” selected as the event location (not a custom/text-only location)?
No—if Microsoft Teams is not selected as the event location, Calendly will not reliably generate and attach Teams conferencing details, because the location field tells Calendly which conferencing provider to create for that booking.
Next, treat the location field as the “source of truth” for conferencing creation, because this is the single most common reason a link is missing even when accounts are connected.
Use this 60-second check:
- Open the event type that is producing missing links.
- Find the Location setting.
- Confirm it is set to Microsoft Teams (not “Custom,” not a phone call, not a manual URL).
- Save, then run a new test booking (old meetings may not retrofit automatically).
If your team has multiple event types with similar names, confirm you edited the one that the scheduling link actually points to. This is a classic operational issue: the “sales call” event type gets fixed, but the public link still routes to “sales call (old).”
What should you check if the organizer sees a link but the invitee doesn’t (or vice versa)?
If the organizer sees a link but the invitee doesn’t, the most likely causes are (1) invite delivery differences between calendar systems, (2) confirmation email settings, and (3) invite rendering quirks—so you should compare the calendar invite object, the invitee’s calendar client, and the confirmation message side-by-side.
However, you don’t need to guess—you can isolate the fault with a short comparison routine.
Comparison routine (3 minutes)
- Compare the same event in two places
- Organizer calendar event details (full view).
- Invitee calendar event details (full view).
- Compare two surfaces
- Calendar invite vs confirmation email.
- If the confirmation email has the link but the calendar doesn’t, the issue is often invite rendering or calendar provider behavior.
- Compare the “fresh booking” vs “rescheduled booking”
- Sometimes rescheduled events carry details differently depending on how updates are applied in the calendar.
To make the comparison easier for non-technical team members, create a simple internal “expected invite checklist”:
- Does the invite show a Teams join URL?
- Does it show conferencing text (“Join Microsoft Teams meeting”)?
- Does the invitee have any warning banner or truncated details?
Evidence: According to a study by Harvard Business School researchers from organizational behavior and related research groups, in 2020 people attended 13% more meetings, and meetings were 12 minutes shorter on average, highlighting how meeting volume can increase while attention time shrinks—making missing join links more disruptive at scale.
How do you choose the right “Teams integration” in Calendly: Teams Conferencing vs Teams Chat?
Teams Conferencing wins for “auto-add meeting links,” Teams Chat is best for “in-Teams notifications,” and using both is optimal when you want automated join links plus real-time scheduling visibility for your team.
Meanwhile, many users install the wrong integration because both contain “Microsoft Teams” in the name, so the clearest choice comes from mapping each integration to the exact outcome you want.
Before the details, this table contains a simple comparison of outcomes so you can pick the correct integration in seconds.
| Integration | Best for | What it creates | Where you see the value |
|---|---|---|---|
| Teams Conferencing | Auto-add Teams join links | A Teams meeting link per booking | Calendar invites + confirmations |
| Teams Chat | Scheduling notifications | Alerts for schedule/reschedule/cancel | Microsoft Teams chat |
Do you want meeting links in the invite (conferencing) or notifications inside Teams (chat bot)?
Yes—you should choose based on your outcome: pick Teams conferencing if you want meeting links in the invite, and pick Teams chat if you want notifications inside Teams, because each integration serves a different workflow problem.
Next, decide using a single operational question: Where do you want the “truth” of scheduling to show up?
- If your biggest pain is “no join link / wrong join link,” your truth should be the calendar invite → choose Teams conferencing.
- If your biggest pain is “I didn’t notice it got rescheduled or canceled,” your truth should be Teams chat visibility → choose Teams chat.
- If you need both link accuracy and team awareness, use both and standardize how the team reacts to notifications.
This approach prevents a common mistake: installing chat notifications and expecting join links to appear—those are separate outcomes.
What are the practical differences in outcomes between the two integrations?
Teams conferencing optimizes joinability, Teams chat optimizes visibility, and using both optimizes coordination—because one writes meeting details into the invite while the other broadcasts scheduling changes to where teams already communicate.
More specifically, the difference shows up in day-to-day execution:
Teams conferencing outcomes (joinability)
- Every booking has a consistent Teams link.
- Invitees can join from browser or app.
- Reschedules carry conferencing details forward, reducing manual rework.
Teams chat outcomes (visibility)
- You see schedule/reschedule/cancel events in Teams.
- You reduce tool switching by keeping alerts in your collaboration hub.
- You can build a shared culture of “respond quickly to changes” because they surface where the team is already active.
This is also where “hook chain” planning matters: once meeting links are guaranteed, the next friction is coordination—who shows up, who prepares, and who adapts when times shift.
How can you extend Calendly ↔ Microsoft Teams beyond meeting links (notifications, automation, and edge cases)?
There are 4 practical ways to extend Calendly ↔ Microsoft Teams beyond meeting links—Teams chat notifications, automated Teams messages, multi-app workflows, and advanced troubleshooting routines—so scheduling becomes both reliable (macro) and deeply connected to team operations (micro).
Besides improving the scheduling experience, these extensions reduce the hidden cost of context switching—because people stop bouncing between calendar, email, and chat to understand what changed.
How do you get schedule/reschedule/cancel notifications in Microsoft Teams chat (Calendly bot)?
Calendly’s Teams chat integration sends notifications for scheduled, rescheduled, or canceled meetings directly into Microsoft Teams chat because it uses a bot-style delivery that keeps you updated without leaving Teams.
Next, set expectations correctly: this integration improves awareness, not conferencing link creation.
A clean setup and usage pattern looks like this:
- Install the Teams chat integration for the user(s) who need alerts.
- Confirm that notifications appear for all three event states: schedule, reschedule, cancel.
- Decide where alerts belong: personal chat vs a shared team channel (depending on your workflow).
This is ideal for fast-moving teams where last-minute changes are common—support teams, sales teams, recruiting, and customer success—because it shortens the time between “a change happened” and “the team reacted.”
What are the best Zapier automations for Calendly → Teams (messages, channels, prep workflows)?
There are 5 high-impact Zapier-style automations for Calendly → Teams based on the criterion “reduce coordination work”: (1) post a Teams message when a meeting is booked, (2) alert a channel on reschedule/cancel, (3) route meetings by type to the right channel, (4) create a prep checklist task, and (5) update a shared log for follow-up.
To illustrate, this is where your linked phrase Automation Integrations fits naturally: you’re not just connecting two apps—you’re building a system that moves information to the right people at the right moment.
Here are the automations that teams adopt fastest because they solve daily problems:
- Teams message on new booking
- When a booking happens, post a structured message: who booked, when, topic, and any intake answers.
- Teams alert on reschedule/cancel
- When a meeting changes, alert the relevant channel to prevent missed calls and wasted prep time.
- Channel routing by meeting type
- “Sales demo” → sales channel, “Onboarding” → CS channel, “Candidate interview” → hiring channel.
- Prep workflow trigger
- When a key meeting is booked, create tasks or reminders for preparation steps.
- Shared visibility log
- Write key meeting events to a centralized place (a doc, sheet, or database) for analytics and accountability.
If your organization already uses cross-tool workflows like google calendar to asana for task creation or asana to google drive for attaching meeting artifacts, Calendly → Teams automation becomes the missing “front door” that triggers those systems at the moment a meeting is actually scheduled.
When should you use Zapier instead of (or in addition to) Calendly’s native Teams apps?
Native Teams apps are best for direct scheduling outcomes (links and notifications), while Zapier is best for multi-step workflows and cross-app routing, so you should use Zapier when you need custom logic, channel selection, or downstream actions beyond Teams itself.
However, the strongest approach is often “native first, automation second,” because native integrations provide the stable core behavior you can trust.
Use Zapier (or similar automation) when:
- You need to notify different channels based on event type or invitee answers.
- You want to trigger tasks, CRM updates, or document workflows after booking.
- You need formatting rules (templates) for messages and logs.
Use native Teams conferencing/chat when:
- Your primary need is stable conferencing links and basic notifications.
- You want fewer moving parts and fewer points of failure.
- You want supportability: standard behavior that teammates can understand quickly.
A practical playbook is:
- Start with Teams conferencing for reliable join links.
- Add Teams chat for visibility.
- Add automation only after you know what messages and actions your team truly needs.
What are the most common “advanced” troubleshooting scenarios after everything looks connected?
The most common advanced troubleshooting scenarios are (1) the wrong Teams account remains connected, (2) links fail for certain event types only, (3) reschedules behave inconsistently across calendars, and (4) invite rendering hides details—so you fix them by isolating account identity, event scope, lifecycle behavior, and client display.
In addition, advanced troubleshooting is easier when you stop treating the problem as “Teams is broken” and start treating it as “which step in the chain broke.”
Scenario 1 — Wrong Teams account stays connected
- Symptom: everything works, but links come from the wrong organizer identity.
- Fix: disconnect Teams integration, clear cookies, reconnect in an incognito session.
Scenario 2 — Only one event type fails
- Symptom: some meetings have links, others don’t.
- Fix: verify location setting for each event type; clone a working event type template.
Scenario 3 — Reschedule creates confusion
- Symptom: invitees see old details or duplicate entries.
- Fix: test reschedule behavior in the calendar system your invitees actually use; standardize reschedule messaging.
Scenario 4 — Invite rendering hides the join link
- Symptom: link exists but appears “missing” depending on client view.
- Fix: instruct users to open full event details; verify via a different client (web vs desktop) to confirm the link exists.
If your team handles a high volume of meetings, advanced troubleshooting is not optional—it’s operational hygiene. Once you document these four scenarios internally, support requests become fast to resolve, and the integration becomes a dependable part of your scheduling infrastructure instead of a recurring fire drill.